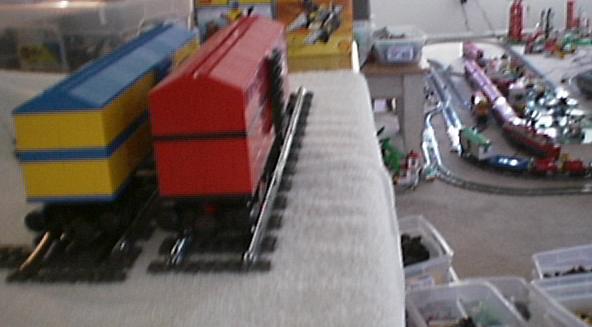
A few snaps of freight cars I have built (so far)
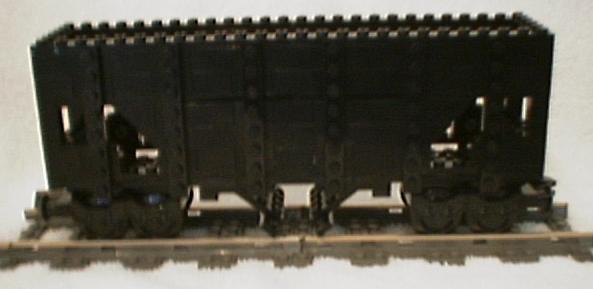
First up are a chemical hopper car and a railbox (next load, any road) logoed box car.
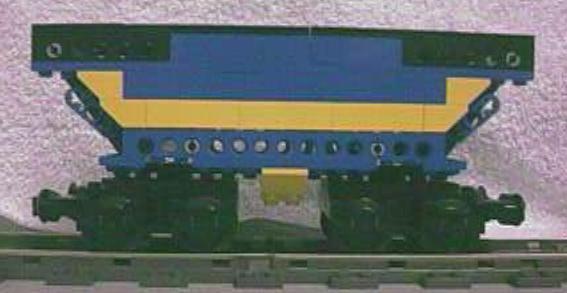
The hopper is made of wall sections, with rounded ends from my 6441 divers base. You can see the hatches of the hopper in the overhead shot on the passenger train page.
The box car has a giant X logo embedded in the wall on each side. The door does not work, but it is stepped back 1/2 stud with the 1x2 center stud plates trick that Kirk Unit taught me.
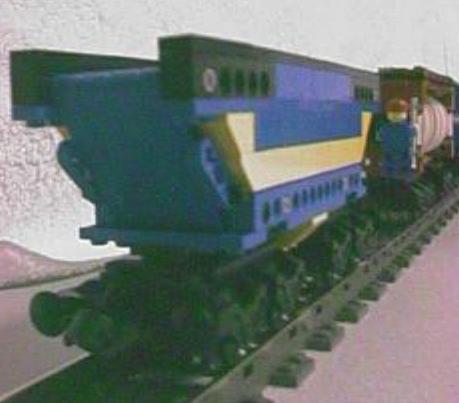
Here is the same covered hopper, after it swallowed 4 Nebula Outposts... a total of 16 wall sections were added. Now that's a BIG hoppper!
first up is a traditional manufacterer's side view.
Here's a view showing the roof hatches.
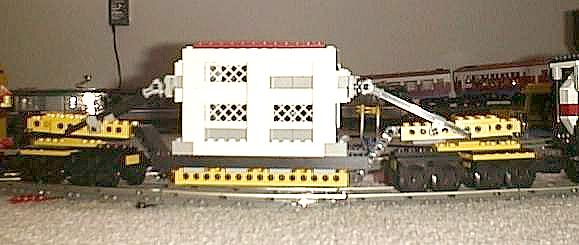
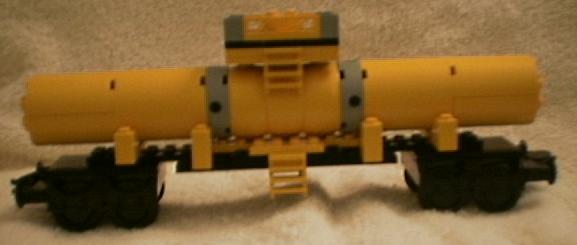
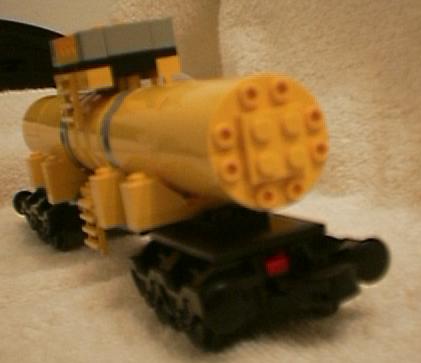
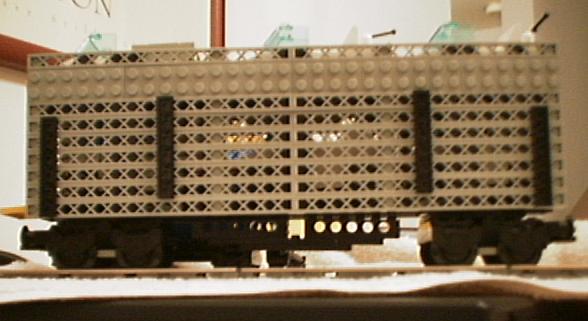
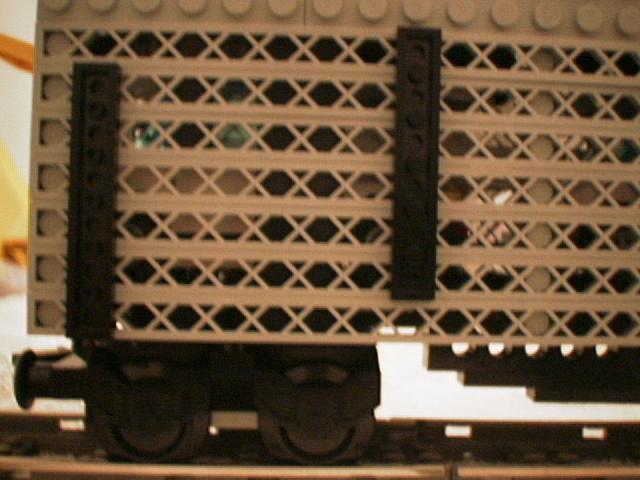
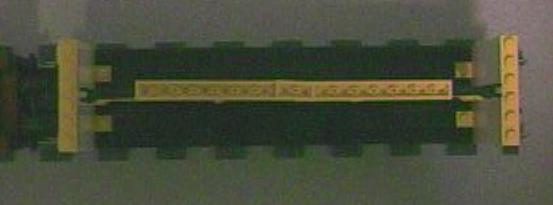
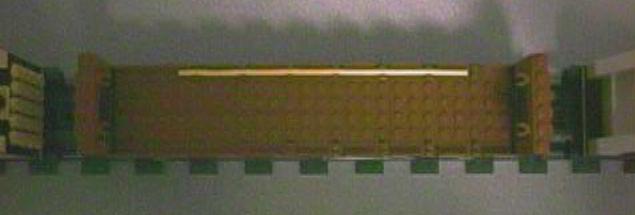
Next up is a depressed center flatcar. The load is 8 studs wide, and 9 bricks high. The car has 8 axles. Each group of two axles is independent and pivots on its own beam. The beams then pivot about where the diagonal braces (technic axles)join. Because I did not have long enough technic plates, one bogie pivot is 1/3 brick higher than the other.
The diagonal braces are for show, they slide through a cross axle connector at the bottom. Since they are connected at the top to a 1x1 with side stud, they cannot stand the strain if you put 1/2 stop bushings below the cross axle connectors. You can see that the braces actually are needed as the car sags in the middle from the weight of the oversize load.
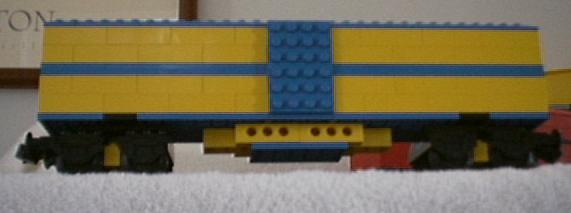
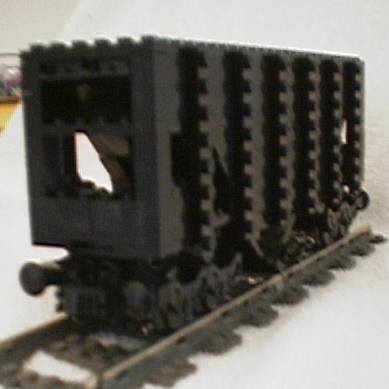
Next up is a baby black hopper car. This is a non working 2 axle design study I did. It has peaked ends, but nothing much else remarkable about it. In the same shot is an attempt at an Auto Rack. It seems rather chunky, I need to try to see what can be done with Technic axles for the superstructure.
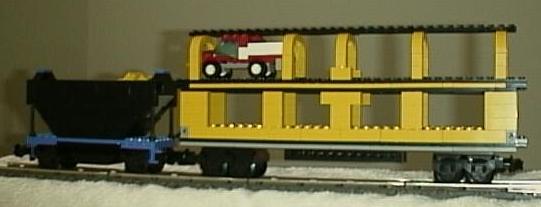
Here is another view of the auto rack showing one vehicle on it. Note how tiny the vehicle is. A minifig will never fit in it! It will be tough to get 2 vehicles on top of each other with proper shrouding, given how high vehicles are.

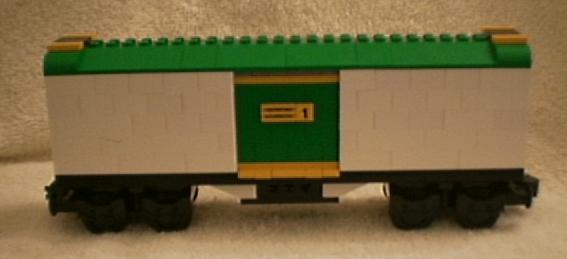
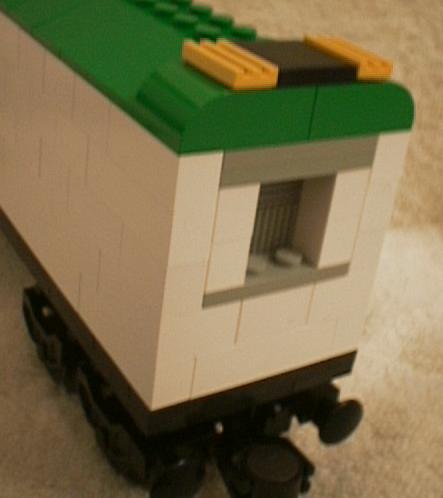
Here is a green and white refrigerator car (reefer in RR parlance). This demonstrates that you can make roof variants by using the rounded end 2x3 bricks. These ends are supposed to stand in for ice hatches. I tried to simulate a mechanical refrigerator as well, the vents are in the ends.
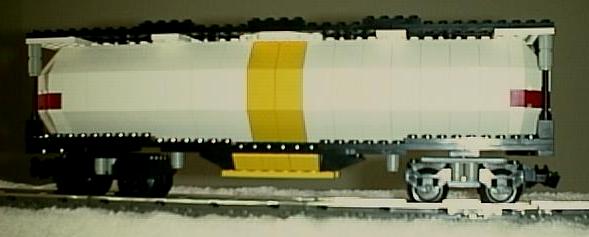
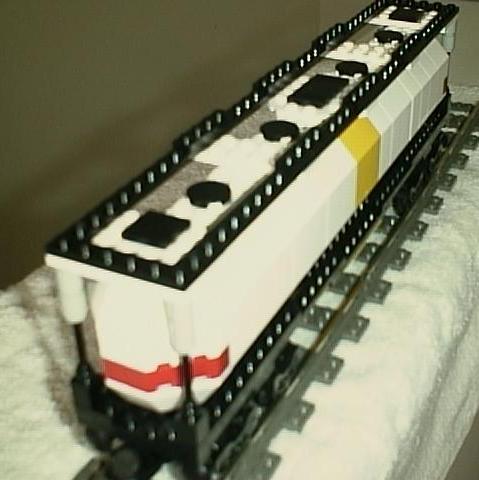
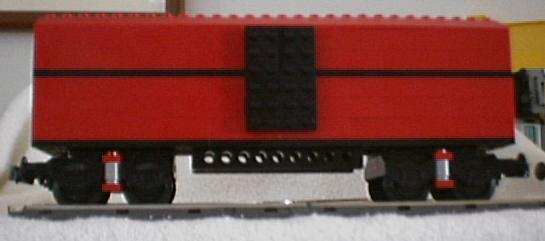
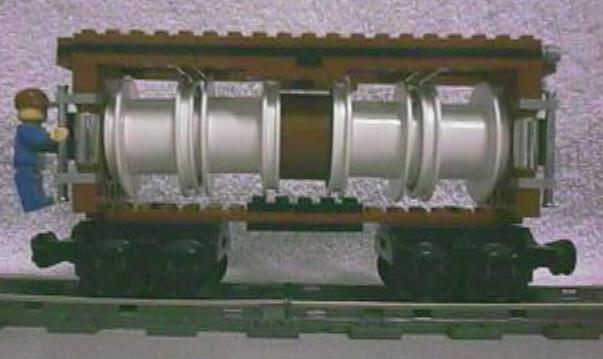
A tank car. I am always on a quest for a better tank car. Here is an attempt that I think came out FAIRLY well, but 4x4 is just not a big enough diameter circle. This uses pieces from the mask UFO set (the round 4x4 bricks) or from 6339. I am not too happy with how fragile this car is.
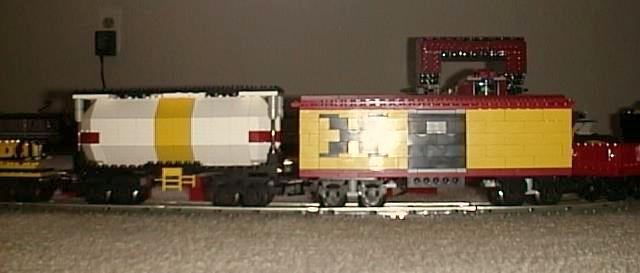
A few bricks later...
Obviously, I got my Auc V winnings and built stuff instead of putting it into the bins.
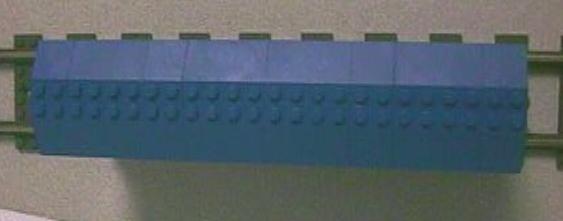
This is a simple blue 4 wheel gondola. I tried putting thinwalls along the top.

Here is a ribbed side gondola. I was going for the look that some gondolas
have of pressed sheets (for strength) where there is no long expanse of smooth
metal.
To save space, here is a pic of the end of both
more stuff from Auczilla winnings..
Can you guess the total number of different parts in this (blue/yellow) one? I tried to make it out of as few parts as possible. Hint: There is one part in the body that you cannot see anywhere in this pic, and 2 in the trucks, not counting the standard truck parts (bogie plate, buffer/coupler, magnet, magnet holder, wheelset) Also, I know of at least one part type that I did not need to use, I could have removed it and accomplished the same thing with a part already used.
I have been quite frustrated trying to come up with a design for a hopper of reasonable capacity. Everything I tried used up every inverse slope I had and looked marginal. (see my first black hopper). Finally I stumbled on the notion of doing the slope sheets with the 1x2 hinges at top and bottom. This allows use of standard 1x4 bricks for the slope, with a little fiddling to get the hypotenuse of any triangle formed to come out close enough to some multiple of brick studs sideways and brick/tiles in height. However since you have three variables to fiddle with (all three sides of the right triangle can be adjusted) I came up with a number of configurations that worked. Here's a shot early in construction that shows what I'm talking about. Only the slope is visible, the sides are not present.
Here is a side shot. I used up all the "technic peg to stud" parts I have doing this.. anyone know a set that has scads, or want to sell some??... each 1x8 plate is plugged into 2 of these, which in turn are plugged into a technic 1x2 single hole brick. A US Hopper without these vertical ribs looks WRONG!!!
Note that the discharge bay doors are open, meaning that this hopper had better be empty or someone has a big mess to clean up. I need to build a coal dock to allow for discharge through the spaces between ties. I tried a side discharge like the 45xx blue hopper but it didn't work very well.
Standard 3/4 view. DON'T THOSE RIBS LOOK GOOOOOD!!!
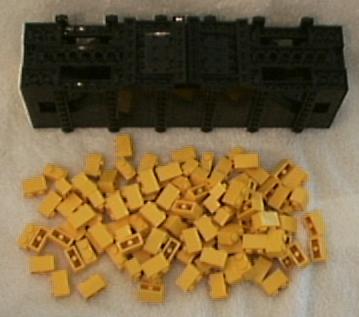
This next view shows clearly how the slope sheets work, as well as the size of the discharge area. US prototype railroads are in a hurry, so the big discharges are required. The prototype slope sheets are as smooth as possible, recessed rivets, no bars or ridges... so are these. This bad boy will dump a full load of 1x2 bricks in about 10 seconds without needing to jiggle it. (blue hopper holds about 1/4 as many bricks, and they get hung up on the slope bricks most of the time)
Bottom view showing the typical bogie plate pivot points using technic 2xn plates, hinge of discharge details, and below, a typical load. There are 110 1x2s there and they fit without heaping. All that in a 26 stud long car. (If I'd had more pegs I would have made a more prototypical double bay or triple bay set up)
Here is a train car to take those new cars away. Holds 6 of the 4544 vehicles. Uses lattice from 7 4544 sets to do the sides. This is definitely a tall car. It sways when it goes around curves at any kind of speed.
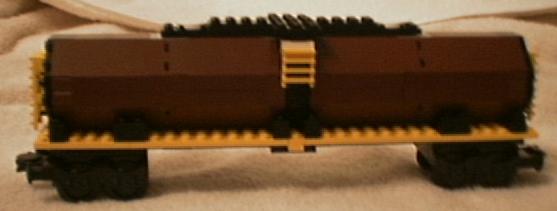
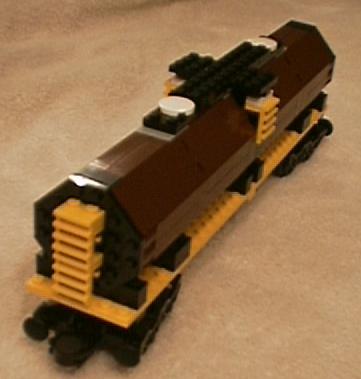
I still want a good tank car... here's another try in brown. Unfortunately the brown makes it look like you know what on wheels. Perhaps it's carrying brown 25.
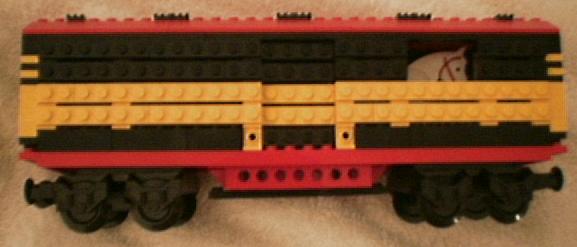
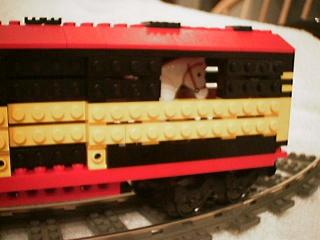
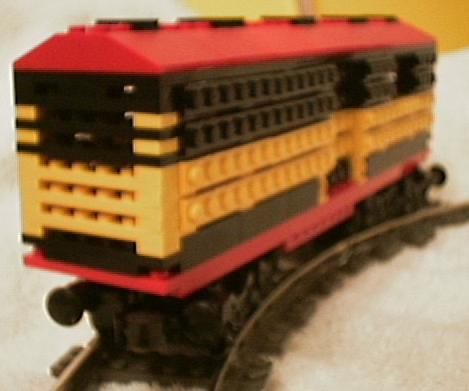
I must have 100 horses. I gave some to my daughter, she's horse crazy, but still... This is what to do with all those horses!!! However, the car only holds 2.. sigh. I have windows ala Lionel (tm) althought I don't have the bobbing horse heads.
These cars were done in Colorado late in 1998.
I got inspired by a Future Car I got at MacFrugals. I wanted to use the bent technic round end beams in it. I also wanted to try some inversion. The PNLTC gang did a car that was built sideways. This one is completely inverted. Except for the trucks, all the bricks face down instead of up. Thus I used slopes instead of inverted slopes on the side sheets.
Aside from the minor point that it wobbles on the trucks a bit, I think it came out great! I plan to try more complete inversion sometime soon. This hopper is not US prototypical, but it does look somewhat like UK Quarry cars (the roommate of a friend at MTU was heir apparent to Foster Yeoman quarries, the largest quarry in the UK..) and somewhat like US ore cars. Color scheme is due to the limited stock of bricks I had on hand when I built it.
This end view shows that the bent beams make a good sloping end sheet from the outside. The blue links on the outside are supposed to be straight out instead of tilted up.
This top view shows that the inside looks smooth as well. I need to work on the dump bays though, they are just simulated, unlike my black hopper.
If this car looks a bit rough, it's important to realise that it was built in a hotel room with just one 8437, a small freestyle set, and the truck parts brought from GR in carryon. Not with my usual vast supply of parts. I still like it which is why I haven't parted and rebuilt it yet.
The end view shows the chrome "grab bars" that came from the california truck. Don't tell OSHA, but these are banned. The practice of riding between cars, which our intrepid worker is doing, is highly unsafe.
The top view shows the loader hatch points, as well as the vent equipment.
All in all, I'm rather pleased with this tanker, it captures the sense of high pressure well. I wasn't sure I could use these hubs at all, but now I know I can. I think they'll also look good used vertically in a cracking tower sort of thing.
Some 1x2 with center top stud tiles gave me studs down the middle to mount the 1x1 with top clip tiles, which in turn hold the rod system ladders. Finally, some more 1x1 with top clips give something to mount 1xN plates to, inverted.
Thin walls, with the wall facing inward, make good parts to use in bulkhead ends.
The inversion of the top plates shows clearly in the top view:
Well, after all that description, I have to admit this didn't really work, the ladders are too lacey, and one row is too short, while two rows are too high. I still need a better central rack.
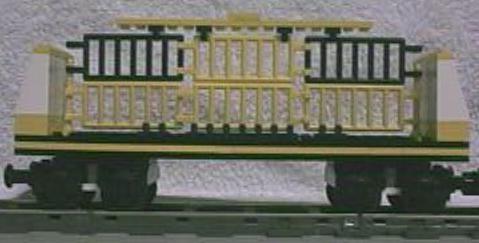
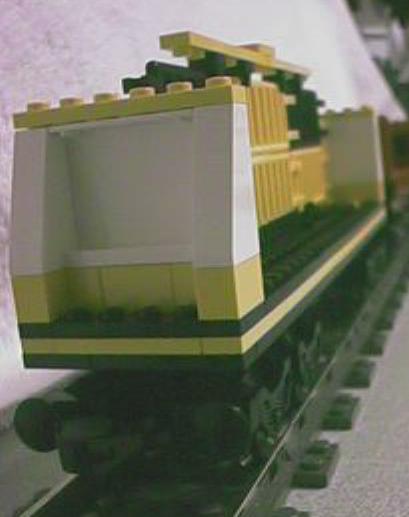
This one is just a plain bulkhead without a center divider. Here, though, I did some work to show the load tie downs. Lots of clips on the ends. and a thinwall/clip/thinwall pattern along the sides. The clips can take rod system rods, but I only had one handy at the time of the picture.
I rather like this one. It made my Christmas train...
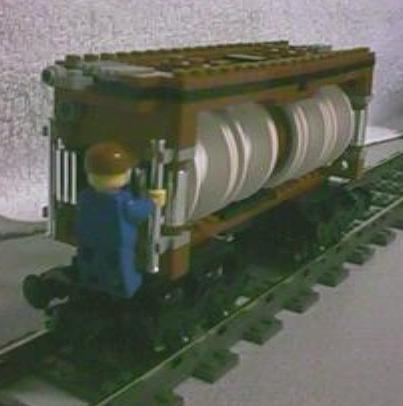
This one came about because I took a lot of AucZILLA winnings, still unsorted, with me when I first moved into my apartment. Sorting them out, I found a LOT of 1x1 rounds, and I started playing. I had always wanted to do a Hydrogen tanker, and this was the result.
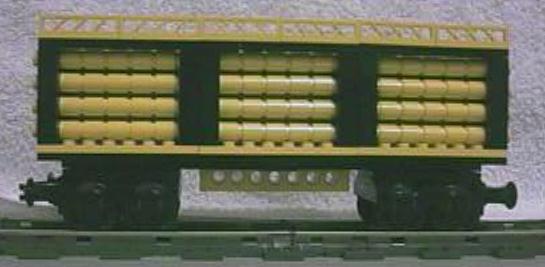
Remember the magic Lego Ratio: 5 bricks high is equal to 6 brick widths across. The side view clearly shows that 5 1x1s mounted horizontally take up 6 bricks of width. One end of each set of 5 is plugged into a technic beam. The other end has a grey technic axle/stud, with the stud end plugged into another technic beam, holding it in place. I wanted the outside ends to be plugged into beams so I could get the ends right (with the axle studs, I would have had to do something different on the ends), which required me to double up the center beams.
There are not as many 1x1s here as you might think. The center of the car is filled with yellow bricks, so there are 5 rows across the top, four rows on each side, or 11 rows total (two rows are on both a top and a side) or 3x11x5 for 165 1x1 rounds.
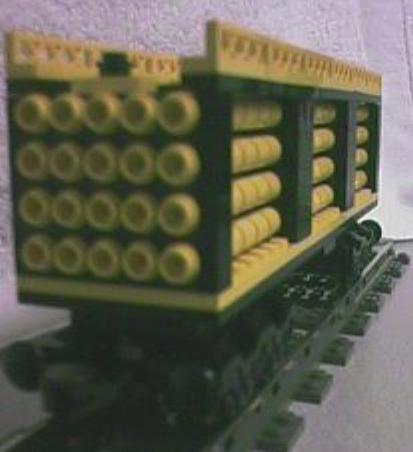
The end view shows what I did to finish off the ends. I plugged a 1x1 round plate into each hole, simulating 20 hydrogen tubes instead of the 11 that actually are there.
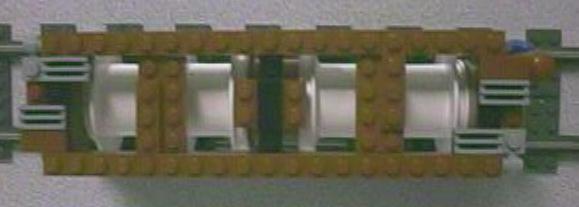
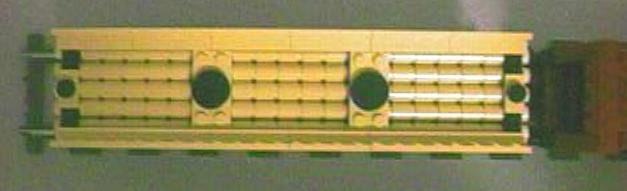
The top view shows the simulated pressurization fittings at the end, and machinery access hatches in the center.
This is another one of my recent favorite cars... I also built a container along these lines ... See my container page (if I wasn't too lazy to get it up there yet...)
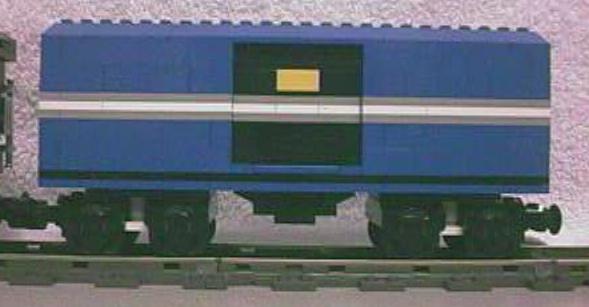
Just another box car. This one is similar in construction to my white reefer. It has an inset door like I always seem to do. One fun thing I did on this one was the grey/white/grey stripe, which carries through the inset door. Also, the yellow information plate on the black boxcar door looks good to me. Here's a side view:
And a 3/4 view

And a top view to show the completely ordinary roof